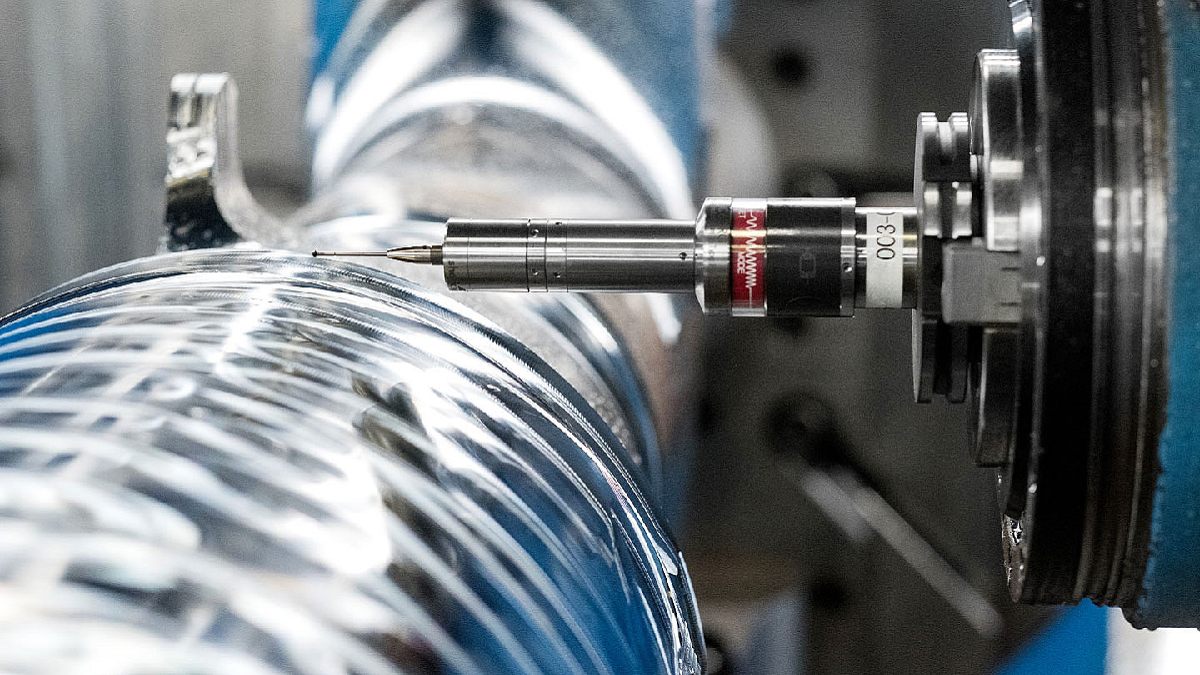
As the world’s leading manufacturer of aircraft landing systems, Safran Landing Systems counts Airbus and Boeing among its customers. Blum-Novotest plays an important role in ensuring that passengers on hundreds of airliners equipped with Safran products arrive at their destination safely day after day. With the TC63-RG roughness measurement system from Blum-Novotest, the Canadian company was able to achieve higher levels of safety and quality in its production process while significantly reducing production times.
Safran has a long history of using Blum-Novotest production measurement equipment to ensure that every assembly leaving the factory meets stringent customer requirements. Initially, Safran primarily used laser measurement systems in its CNC machining centers to measure tool length and radius and monitor tool wear and breakage. “For some years we have been using the TC63 CNC probe to measure parts in our machining centers. We recently added the BLUM TC63-RG surface roughness measurement system, which we now use to automatically monitor surfaces. Surfaces are a particularly critical feature in the high-tech systems that Safran manufactures,” says NC coordinator Shawn Page and adds, in view of the production of landing gear components: “The machining process is labor intensive. Indeed, precision is essential for our customers and surface quality is of the utmost importance.“
The main component of each landing system is a massive forging that can weigh up to eight tons. Each of these parts is machined in CNC machining centers, first using roughing machines, then through a finishing process that gives the part its final dimensions. The last step is to check the quality of the surface. As the surface test had to be performed while the finished part was still clamped in the machining center, this measure impacted not only operator time, but also machine cycle time. On each piece, ten different areas had to be tested in a process that took around 45 minutes. Since the accuracy of the measurement depended on the operator holding the measuring device in the correct position, the potential for human error also had to be considered. Due to the amount of effort involved, Shawn Page, who normally oversees production at Safran, had to check a number of surfaces himself.

To be able to handle the growing volume of work, reduce manual processes and maintain and improve high quality control standards, it became necessary for Safran to automate the process. Surface quality examination was an area where Page saw potential to improve accuracy and increase the rate of parts examined, while freeing up operating personnel. Additionally, the NC coordinator wanted to increase the amount of data collected during production and allow that data to flow back into the production process. There was no doubt that something had to be done, so Shawn Page contacted Blum-Novotest.
After several convincing product presentations, the right decision was made to have the main components of the landing system examined using the TC63-RG. Since then, the TC63-RG has proven itself in Mirabel, where it monitors surface quality quickly and reliably. The gauge is mounted in the machine spindle like a normal CNC probe and measures surface roughness at predefined locations. The surface of the part is examined to the nearest μm and the roughness parameters Ra, Rq, Rt, Rz and Rmax are determined in a few seconds.
The Canadian company plans to integrate BLUM measuring equipment even more closely into the machining process in order to detect tool wear and deviations before serious problems arise. The next step will be to expand to other machines and processes at Safran. “We are very pleased to have finally found a solution with the TC63-RG that significantly reduces the time needed to examine surface roughness and thus significantly increases cycle time while eliminating human error in the measurement process,” Shawn Page summarizes. “This has enabled us to significantly increase the productivity of our machining process. Not only that, but we can now use the time saved for more intensive part inspection and we test many more surfaces than before. As a result, our production process has become much more reliable and produces higher quality products.
For more information: www.blum-novotest.com


More Stories
rice production process in east China’s Jiangxi – Xinhua English.news.cn
Michelin describes ‘transformational changes’ to tire factory operations
Cellforce finalizes the electrode coating production process